Guide 4: Customer Contacts and Email Requests
Introduction
The Contacts page is essential for sending review requests via email. This guide will walk you through the process of importing contacts from a CSV file or creating a contact manually, as well as managing and sending review requests.
Step-by-Step Guide
Step 1: Access the Contacts Page
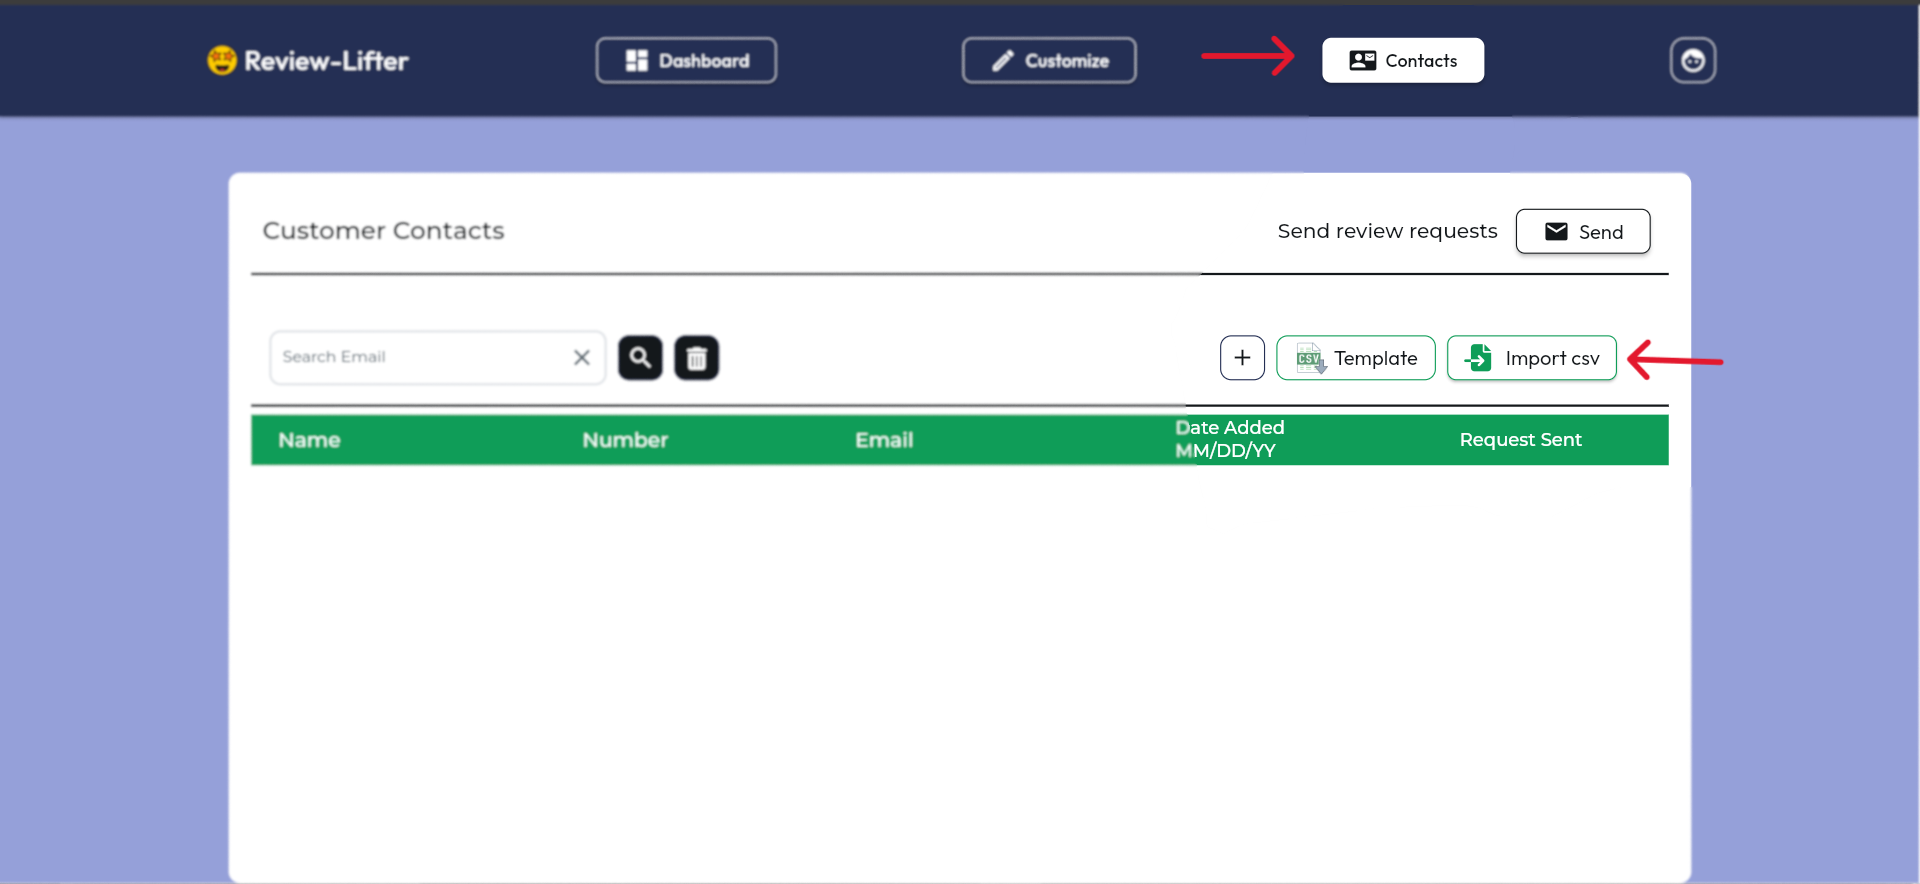
Once your review link is live, its time to send review request to your customers via email, start by navigating to the Contacts page.
Step 2: Import Contacts from a CSV File
- Prepare Your CSV File: Ensure your CSV file has columns named "name", "number", and "email".
- Import CSV: Click the "Import CSV" button. You will be navigated to the import page.
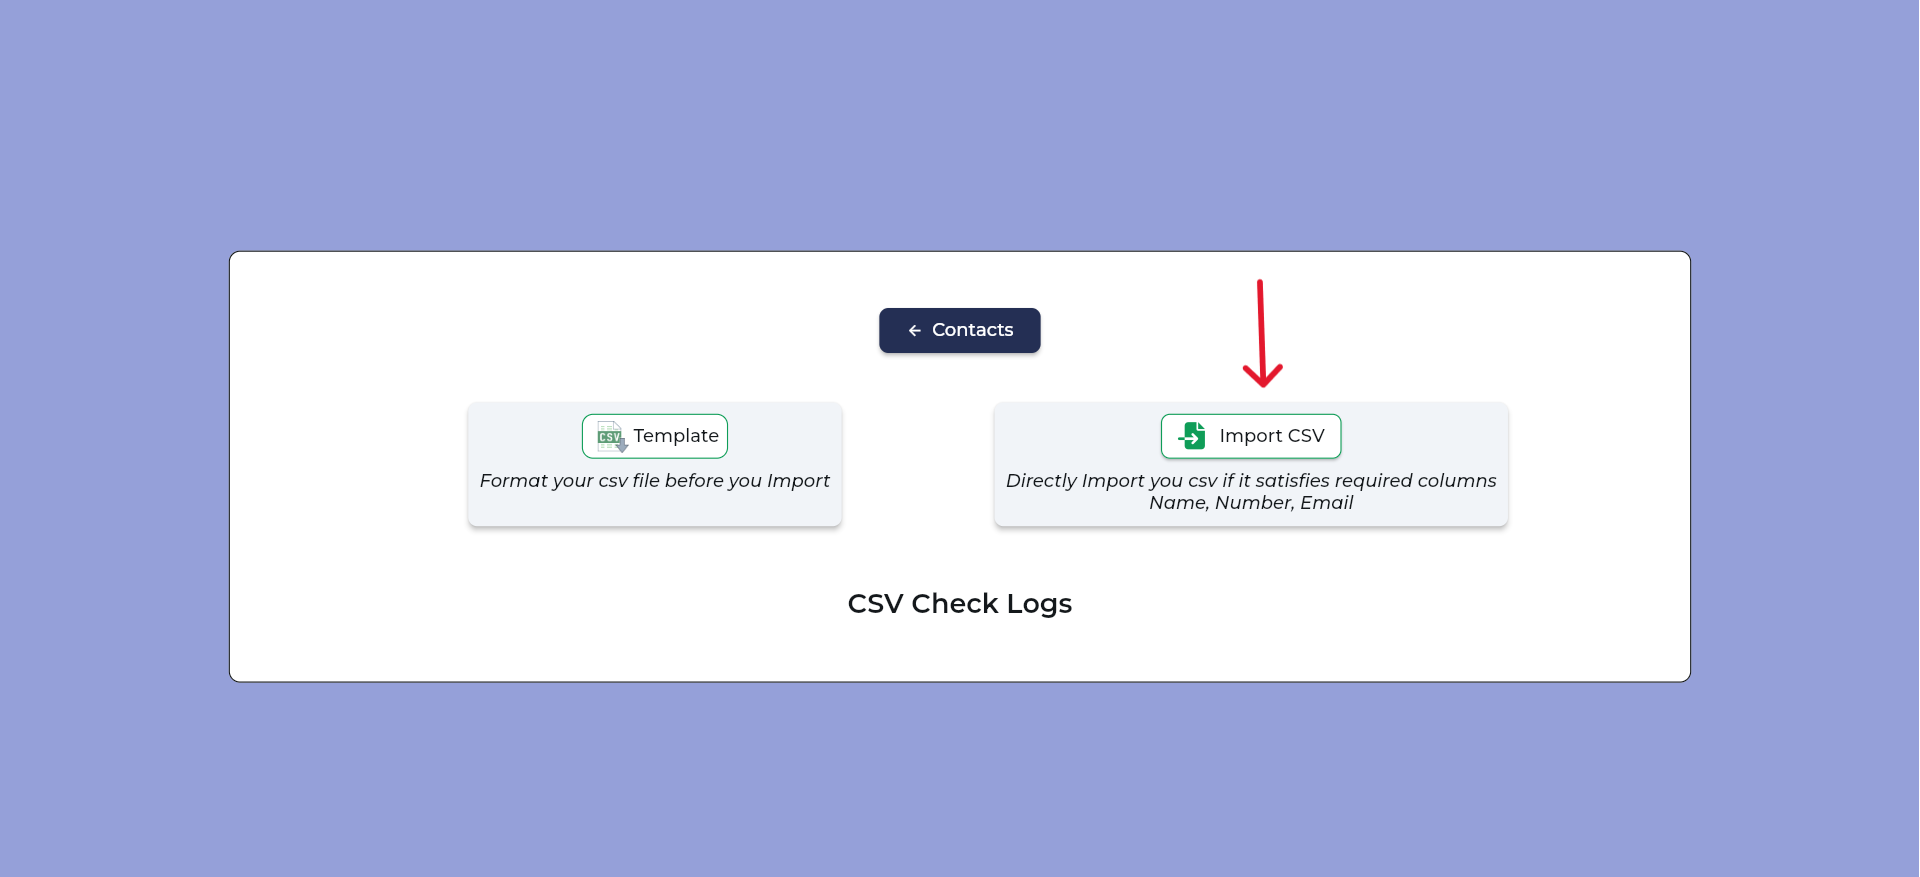
- Choose Your File: On the import page, click "Import CSV" again and select the prepared CSV file from your system.
- Verify Columns: Ensure the columns in your file are correctly named as "name", "number", and "email".
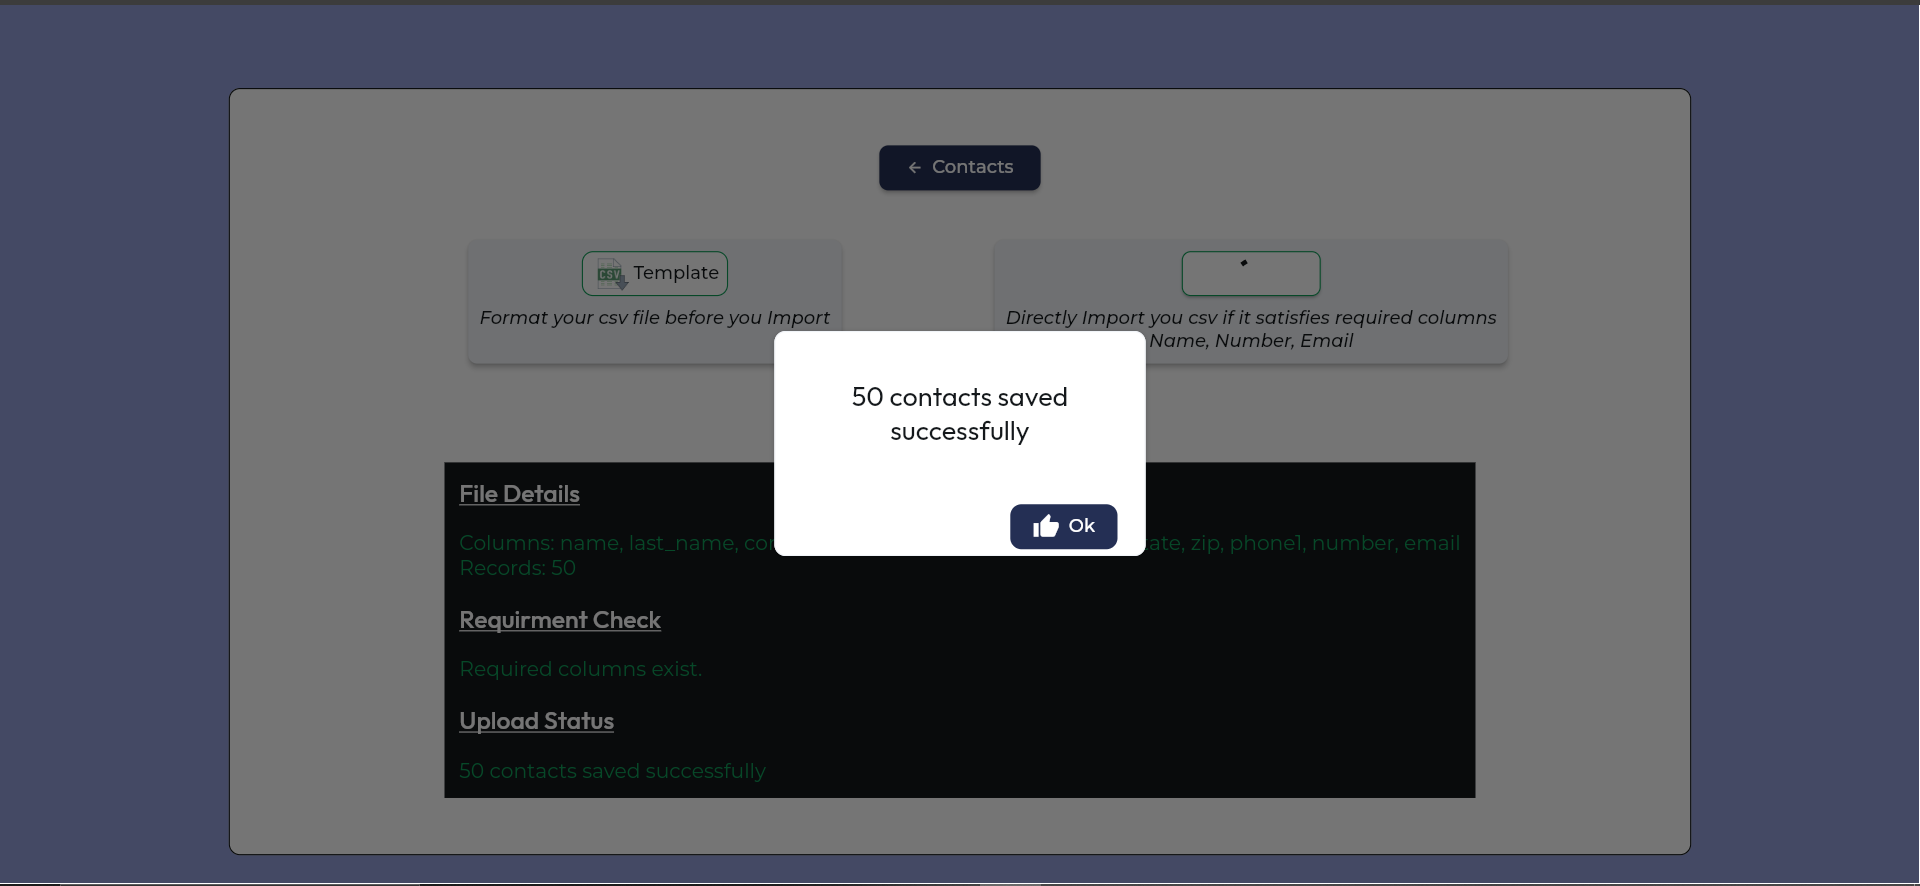
- Import Contacts: Once the file is selected and verified, the contacts will be imported, and you will be directed back to the Contacts page where all imported contacts will be displayed.
Step 3: Create a Contact Manually
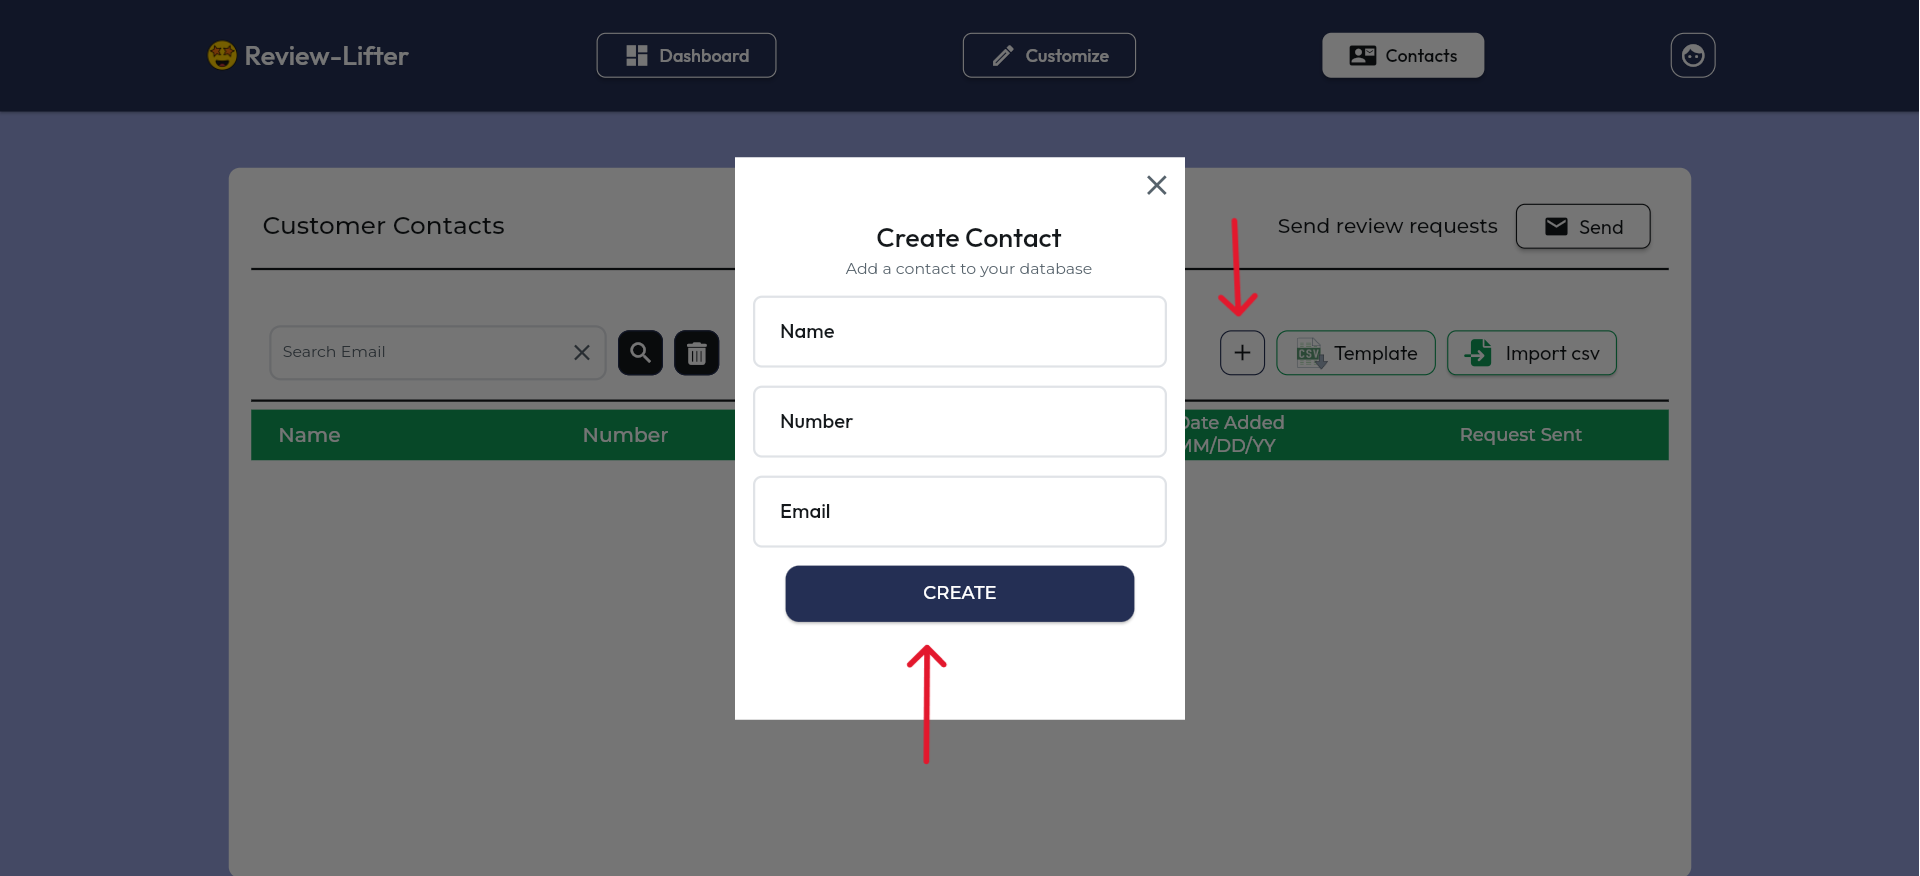
- Add Contact: Click the Plus (+) button to create a contact manually.
- Enter Details: Fill in the required fields: name, number, and email.
- Create Contact: Click "Create" to add the contact to your list.
Step 4: Send Review Requests
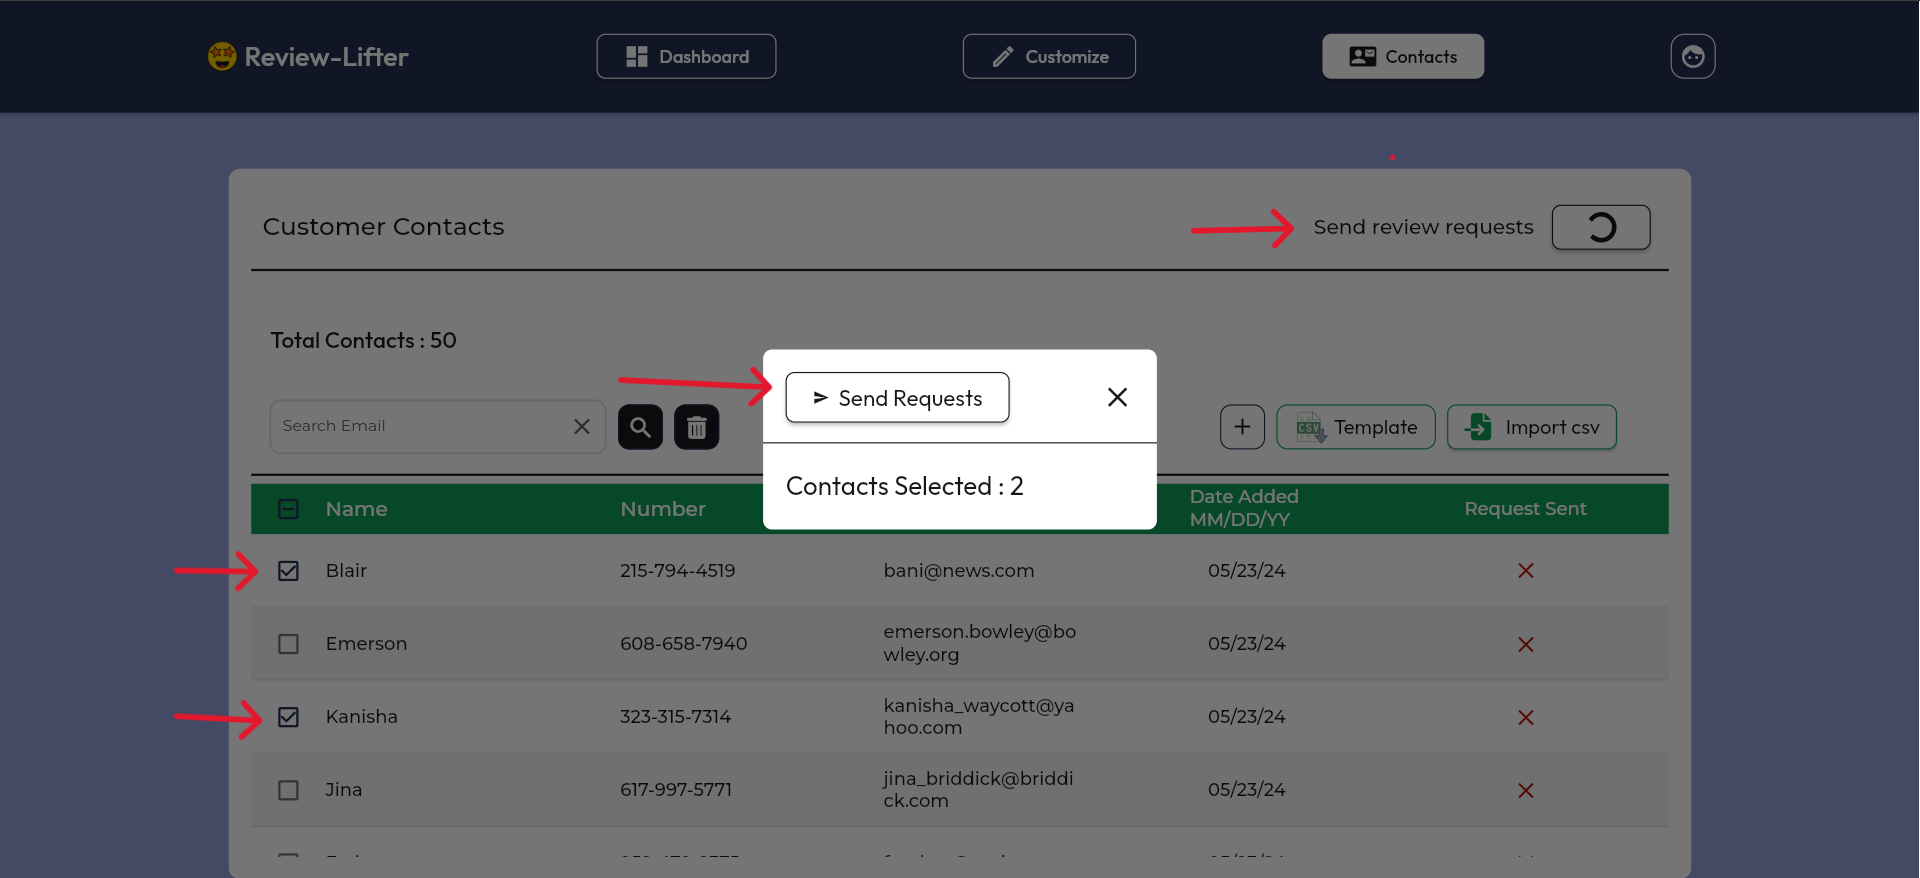
- Select Contacts: On the Contacts page, select the contacts you want to send review requests to.
- Send Requests: Click "Send". Verify the number of contacts you are sending to in the pop-up, then click "Send".
- Confirmation: Once sent, the contacts will be marked as "email sent" and cannot be sent another request even if selected again.
Step 5: Delete Contacts
- Select Contacts: Select the contacts you want to delete.
- Delete Contacts: Click the delete icon to remove the selected contacts.
Step 6: Search Contacts
- Search: Use the search box to find a contact by typing their email address.
Conclusion
Managing your contacts efficiently is crucial for sending timely review requests. Follow the steps in this guide to import, create, and manage your contacts effectively. Remember to verify details before sending review requests to ensure accuracy.
For more support, contact our support team at support@review-lifter.app.
Next Steps:
Dashboard: After your review requests are sent out via email, you can monitor and track customer interactions.
Guide 5 : Dashboard & Customer Interactions